Start with Channels!
Channels are the primary format Endavo uses to organize your video content. Add all of your content - including on-demand videos, live events, live channels, and Series - to channels, where you can organize, add custom branding and establish rules for your content, such as subscription paywalls.
-
- Start setting up your channel(s) by going to the Channels page and click Add New. (Advanced: Create multiple channels to organize a larger library of various content).
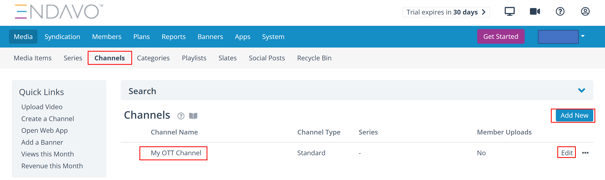
- Your free trial sets you up with a starter channel (My OTT Channel) and that has been published to your starter ottchannel.com trial website.
- A Channel can contain any and all video formats supported on the Endavo platform, including standard video files, live events, live channels, and Series (episodic, seasonal content).
- Content can be added or removed from a channel at any time. Also, content can be added to multiple channels if desired.
- Start setting up your channel(s) by going to the Channels page and click Add New. (Advanced: Create multiple channels to organize a larger library of various content).
Upload Video Content
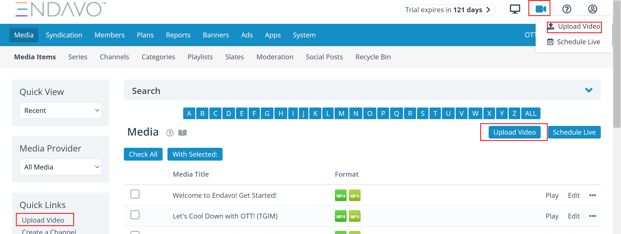
Once you’re ready to start uploading content into your account, Endavo can easily ingest your content from multiple sources. To get to upload page, click Upload Video from multiple locations on your main page.
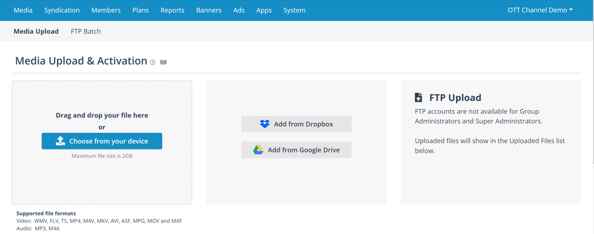
💡 Pro Tip - Endavo supports the following video and audio formats:
Video: WMV, FLV, TS, MP4, M4V, MKV, AVI, ASF, MPG, MOV and MXF
Audio: MP3, M4A
- Large-sized or large quantities of files can be uploaded by FTP, by following FTP instructions (Advanced: We can batch upload content library metadata via XML).
- To start uploading, go to the Upload tab and start uploading directly from your computer, Dropbox, Google Drive, or FTP.
File Activation
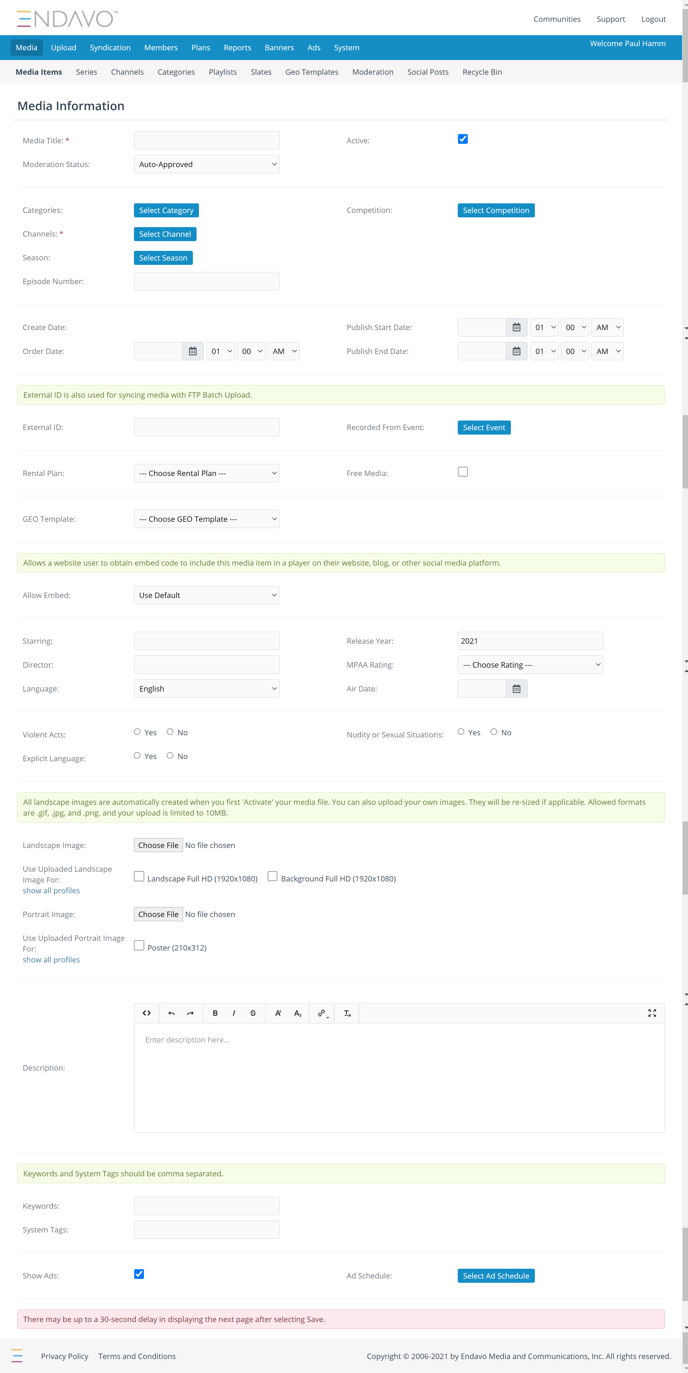
Once uploaded, you will be taken to the media information form to activate your uploaded file. You can choose to exit and activate later. If so, you will notice a list of your uploaded videos under Uploaded Files on the Upload Page (Note: Any corrupt or unsupported files will show under Unsupported Files and will need to be re-uploaded in a compliant format). Activate uploaded video files by clicking Activate and completing the activation form. Some fields are required; most are optional (you can go back and add/edit fields later).
-
- When you activate, you must add the newly activated video to at least one Channel (Advanced: If any of your content is in a series format (episodic/seasonal), you can create one or more “Series” to organize episodically and seasonally. Series can also be added to Channels alongside non-serial content or they can be separate depending on how you want content organized on your site/apps).
- Video Content can contain a lot of information (metadata) that can help your viewers discover content on your Endavo apps, but also help with SEO. Video information can be added and edited at any time after activation, but certain basic information is required upon activation:
- Title *
- Channel *
Thanks for reading! Check out our resources and blog on our website to get more helpful tips, use cases, and creative ideas for building your OTT business.