Activate, review and edit a Media Item (video file).
The Media Information form has many fields and options to help you organize and manage your individual files in your content library, set access & publishing rules and drive viewer discovery with metadata that is published with your video on your apps.
Media Information page in edit mode:
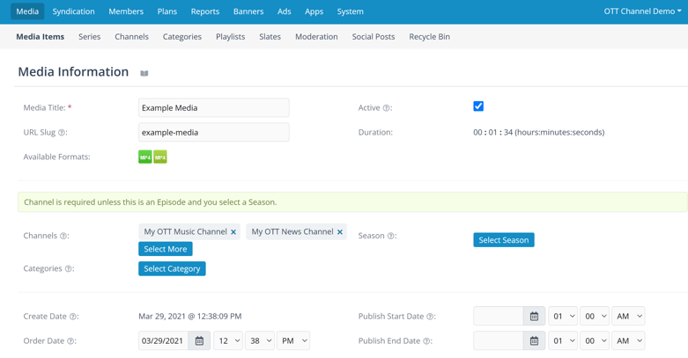
Main Media Information Page fields and options:
- Name - required
-
Active - Activate to make available for publishing to a playlist. Uncheck to keep video in inventory but make unavailable for publishing. Checked by default.
-
URL Slug - this will be used for the URL of the individual video. Automatically created by the system.
-
Categories - If you have set up Categories for your service (optional), select the best one or more from available categories for this video.
-
Channels - Every video needs a home. Channels are the primary method for organizing content and at least one is required to be assigned to each media item.
-
Season - Only for episodic videos belonging to a Season and Series. Select the Season this episode belongs to.
-
Episode Number - Enter episode number for season selected. We use this to keep episodes in order.
-
Create Date - Date this video was activated in your account
-
Order Date - Usually same as Create Date but can be modified if you want to manipulate chronological order in your channel or other listings by order date.
-
Publish Dates - Use these dates if you want to preset a publishing window, start and end date.
Additional Information and video metadata:

-
Recorded from Event - Only use this if you have uploaded your own recording from a live event you streamed on Endavo. Selecting this associates this video with the event for event rental purchaser access.
-
Rental Plan - Select a rental plan if you want to charge a one-time price to view this video.
-
Free Media - Check this box if this video is in a subscription channel but you want to allow free access to this video to anyone.
-
Allow Embed - allows the system to create an embed player for this video from the Media Items page (if embed players are available)
-
Landscape Image - Recommended to upload 1920x1080 image
-
Portrait Images - Not for standard use. Can be used for custom apps and carousels
-
Description - It’s important to add a brief but complete description of your video to drive search and discovery.
-
Keywords - You can add keywords to improve search and discovery
-
System Tags - Only used in special circumstances to pull content by system tag.
-
Ads - You can choose to allow ads to play with this video and choose the ad schedule.
-
Ad Schedules - Adding a schedule at individual media item level overrides channel and app level schedules
There are additional areas below the general information area (in non-edit mode) that allow you to add and review additional features and activity related to your Media Item:
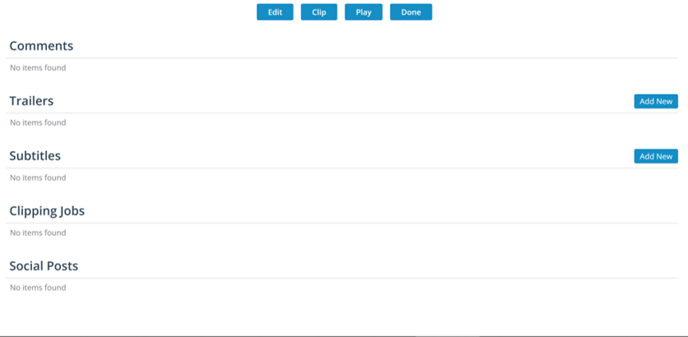
- Comments - if comments are active, you can review comments made on your media item. If moderation is set to "approval" you can accept/reject comments here. You can always remove unwanted comments here.
- Trailers - Add a trailer to your media item, especially if you plan to put the video behind a registration or paywall.
- When you click Add New, you will be taken to the Upload page.
- Upload your trailer just as you would a new video for your content library.
- Activate as usual as well.
- Upon activation, the trailer will appear in the trailer section of your media item instead of in your main media items list.
- Subtitles - if you would like to add subtitles to your video and have the subtitles transcript available in SRT or WebVTT format, you can easily add them to your video. Click Add New, choose language and upload your file.
- Clipping Jobs - you can track when this video has been clipped (a feature on the Media Items page). You can also clip your video (top and tails edit only) directly from your Media Item information page by clicking Clip button.
- Social Posts - you can track when clips from this video have been shared over your connected social accounts (a feature on the Media Items page).
Thanks for reading! Check out our resources and blog on our website to get more helpful tips, use cases, and creative ideas for building your OTT business.